Introduction
EPDM pond liners are popular because of their durability, UV resistance, and flexibility. But even the toughest liners can occasionally develop a tear or puncture — from sharp rocks, tree roots, or even pets. The good news? You don’t need to replace the whole liner. With the right tools and materials, you can patch an EPDM pond liner quickly and effectively.
In this guide, we’ll show you step-by-step how to repair your pond liner and keep your pond leak-free for years to come.
Why EPDM Pond Liners Tear?
Before jumping into the repair, it’s useful to know what causes damage:
-
Sharp objects under the liner (stones, roots, or gravel).
-
Accidental cuts from tools during installation or maintenance.
-
Aging adhesives or sealants that lose flexibility.
-
Extreme weather conditions (freeze-thaw cycles, heavy UV).
👉 Tip: Installing a protective underlay beneath your liner significantly reduces the risk of punctures.
Tools & Materials You’ll Need
To patch your EPDM pond liner, prepare the following:
-
EPDM pond liner repair tape or patch kit
-
EPDM primer / cleaning solution
-
Clean cloth or sponge
-
Roller or flat tool for pressing the patch
-
Scissors or utility knife
(If you don’t have these, you can order a ready-to-use Pond Liner Repair Kit. We supply complete repair kits directly from the factory — ideal for both retail and wholesale customers.)
Step-by-Step: How to Patch an EPDM Pond Liner
Step 1: Drain and Clean the Area
-
Lower the pond water level until the damaged area is exposed.
-
Clean the surface thoroughly — remove algae, dirt, or moisture.
-
Let the liner dry completely.
Step 2: Prepare the Patch Area
-
Cut a patch at least 5–7 cm larger than the tear in all directions.
-
Round the patch corners to avoid peeling edges.
-
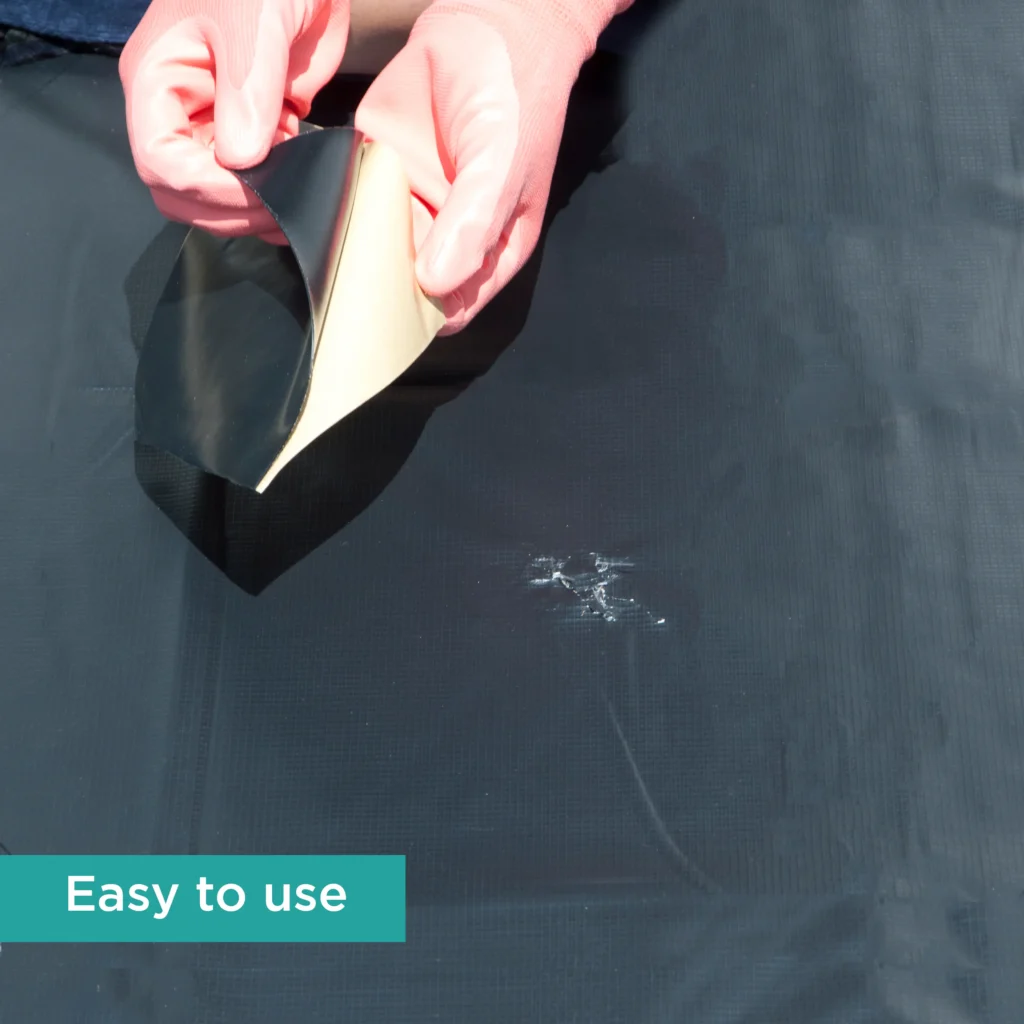
Apply EPDM primer to the liner surface and the patch’s underside.
Step 3: Apply the Patch
-
Wait for the primer to become tacky (not wet).
-
Carefully place the patch over the tear.
-
Use a roller or firm pressure to smooth out air bubbles.
Step 4: Seal the Edges
-
Apply extra pressure around the edges.
-
For added protection, you can use EPDM seam sealer along the patch edges.
Step 5: Wait & Refill
-
Allow the adhesive to cure (usually 24 hours).
-
Refill the pond and check for leaks.
How Long Will a Patch Last?
When done correctly, a patched EPDM liner can last as long as the original liner. In fact, many pond owners never need to re-patch the same spot.
Common Mistakes to Avoid
-
Patching a wet or dirty surface → adhesive won’t stick properly.
-
Cutting a patch that’s too small → leaks reappear.
-
Skipping the primer → weak adhesion.
Conclusion
Repairing an EPDM pond liner is straightforward if you have the right kit and follow the correct steps. Instead of replacing the whole liner, a simple patch can save you time and money.
👉 If you’re looking for affordable, factory-direct EPDM repair kits or liners, we supply bulk orders worldwide. Our products are manufactured in China and shipped directly to UK & EU partners — giving you the same professional quality as local brands, but at a more competitive price.
Suggested Call-to-Action (CTA)
-
“Looking for pond liner repair kits? Contact us for wholesale and retail supply.”